Procreate Demo: How to Make Wreath Brushes
In this Let's Talk: LIVE, we're making wreath brushes! You can use this process with any brushes to achieve a wide variety of results. In the demo, we used some default brushes, and brushes from the Overlay brush pack.
You can purchase those brushes here:

Canvas set up:
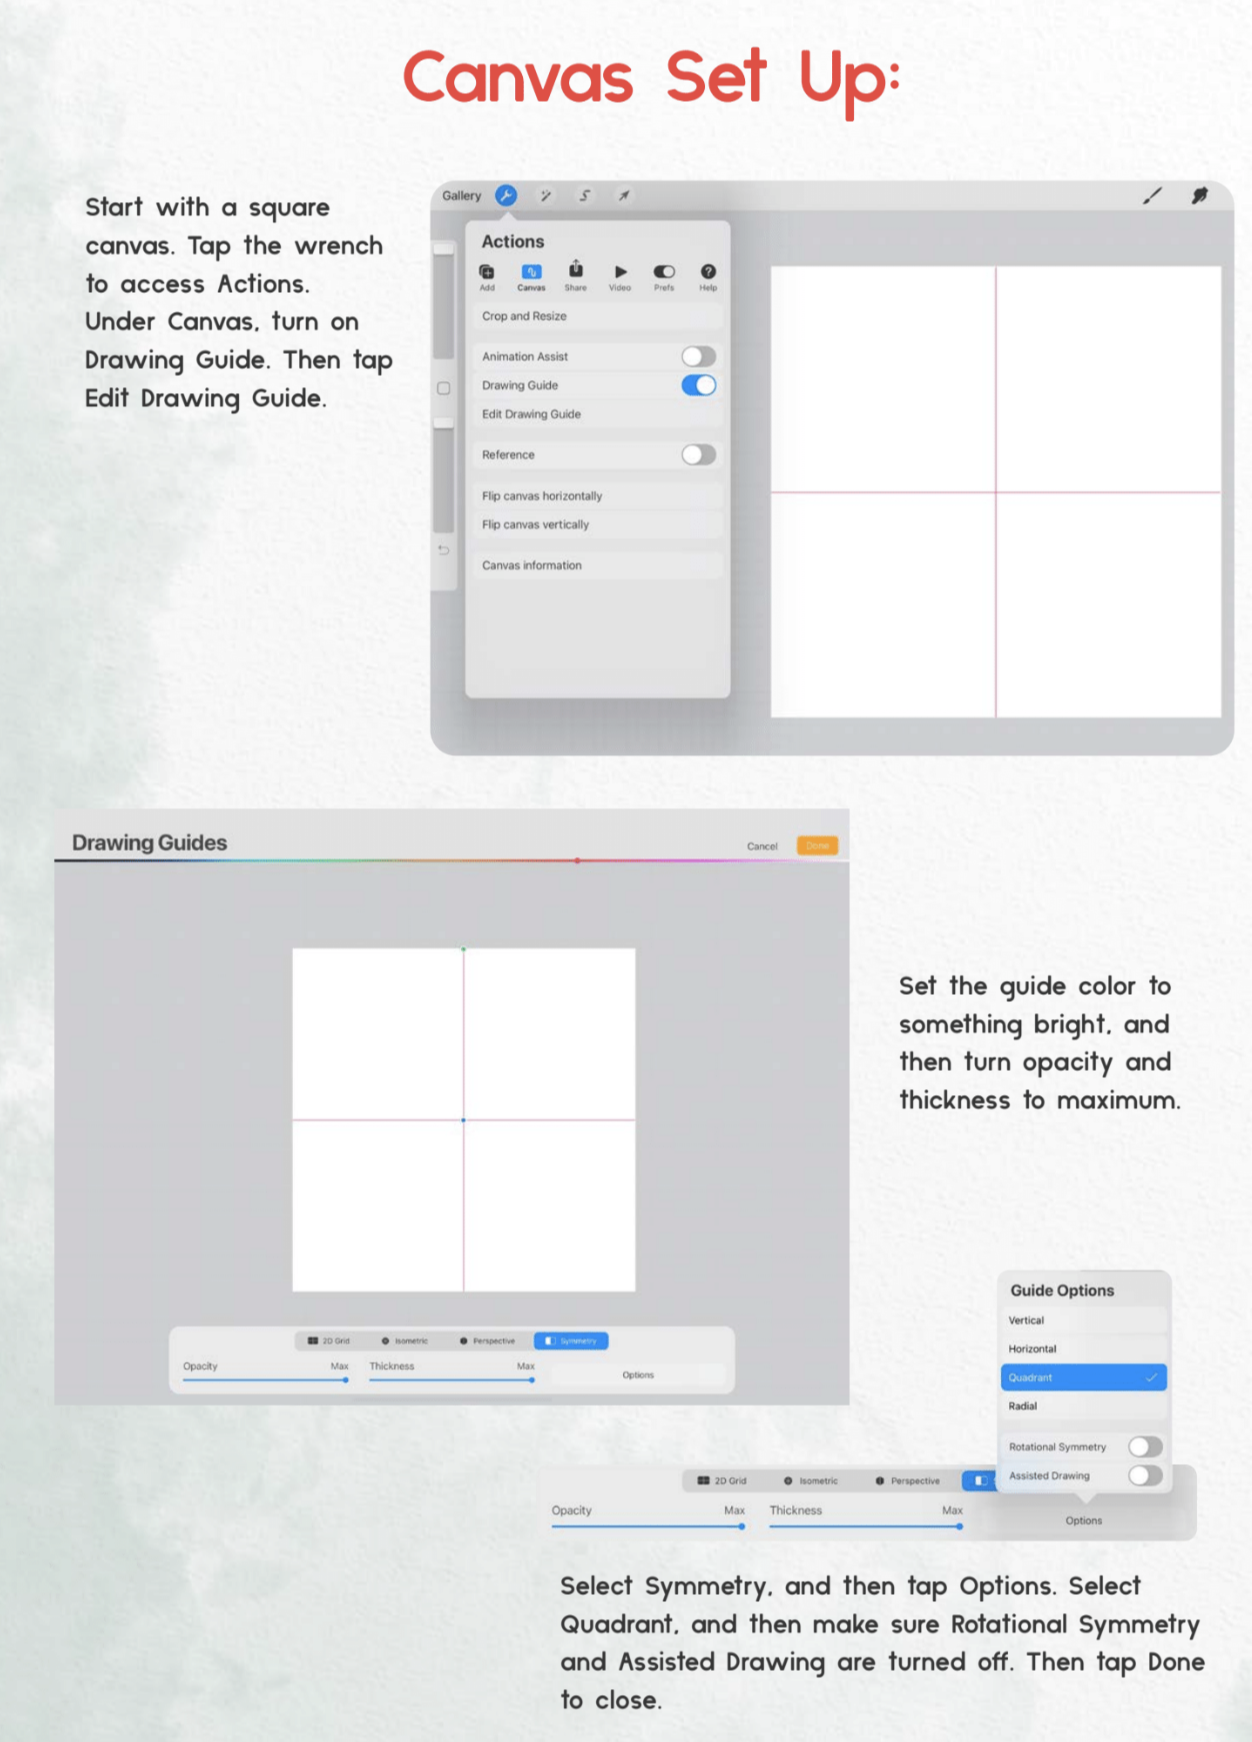
Start with a square canvas.
Tap the wrench to access Actions.
Under Canvas, turn on Drawing Guide.
Then tap Edit Drawing Guide.
Set the guide color to something bright, and then turn opacity and thickness to maximum.
Select Symmetry, and then tap Options.
Select Quadrant, and then make sure Rotational Symmetry and Assisted Drawing are turned off.
Then tap Done to close
Brush Stamp:
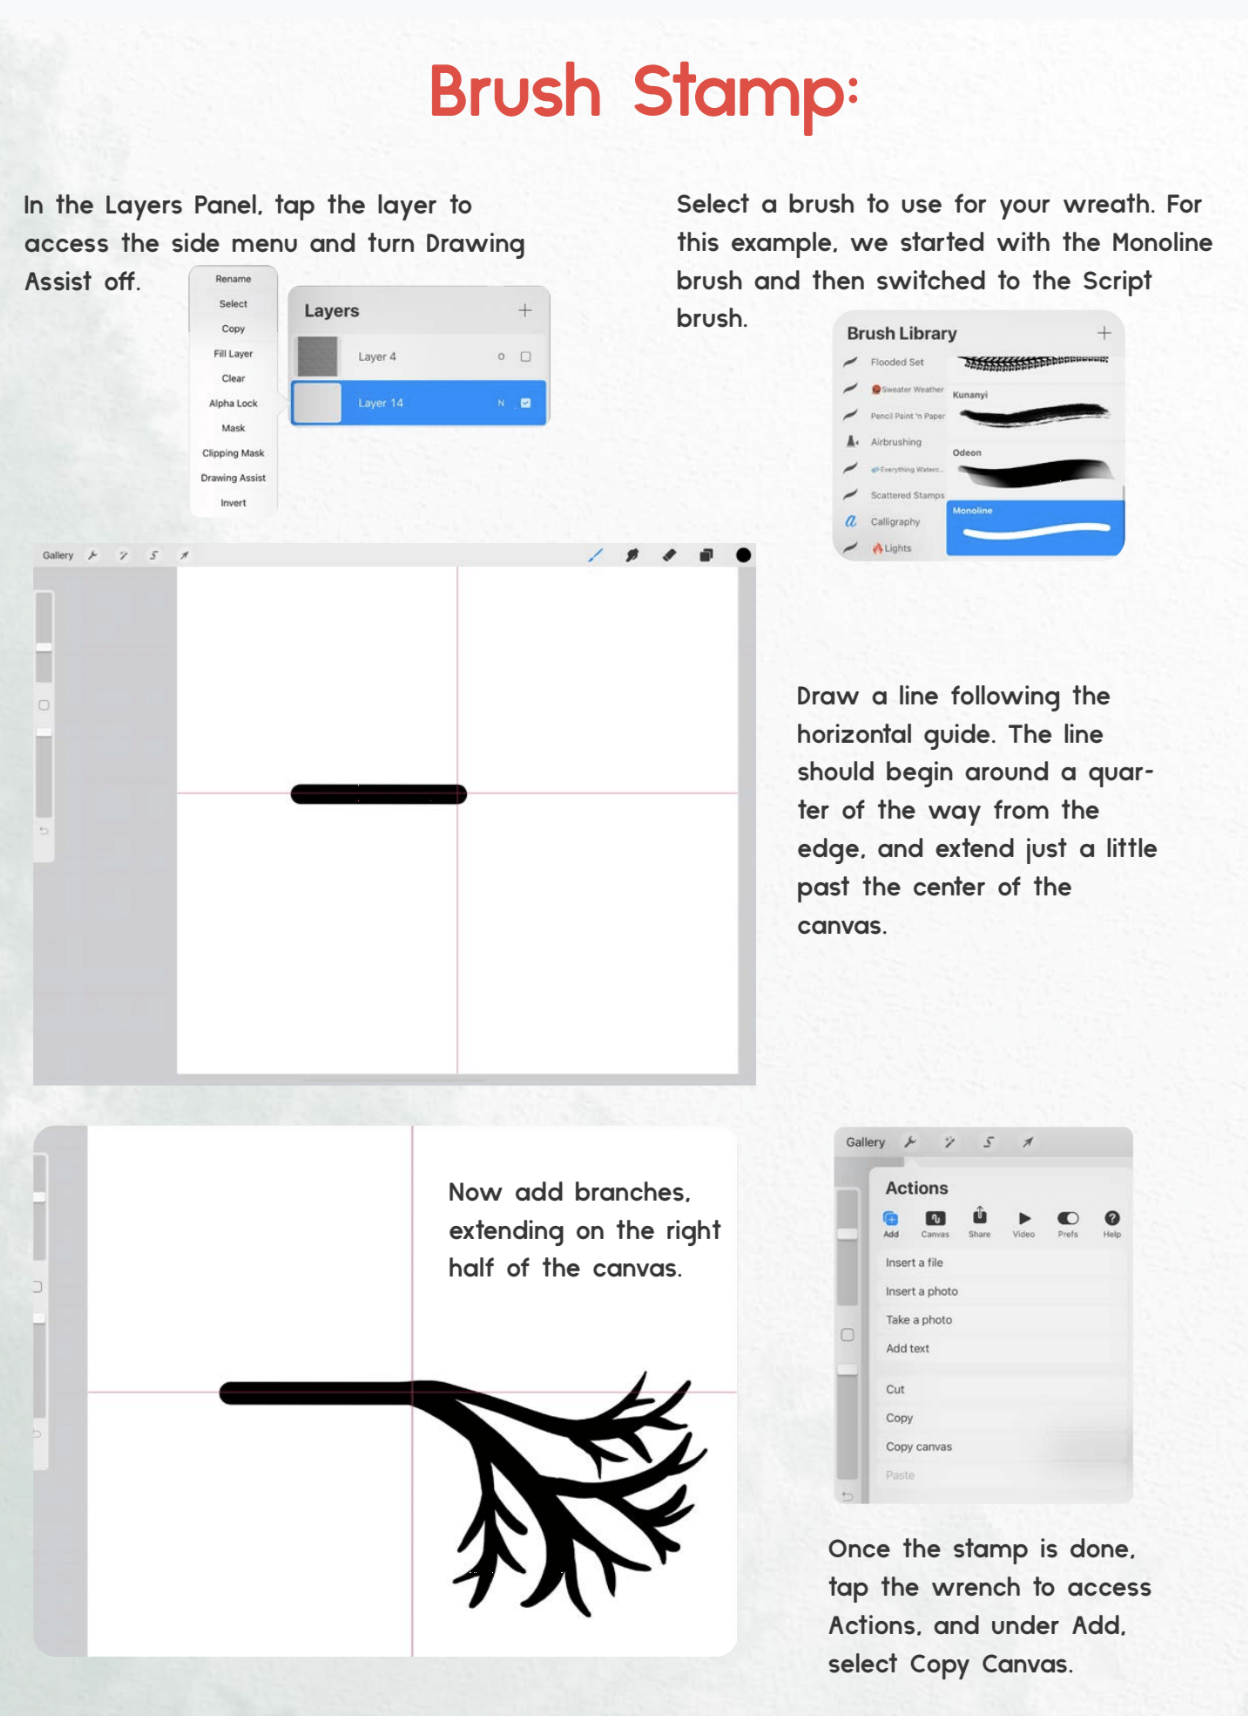
In the Layers Panel, tap the layer to access the side menu and turn Drawing Assist off.
Select a brush to use for your wreath. (For this example, we started with the Monoline brush and then switched to the Script brush.)
Draw a line following the horizontal guide. The line should begin around a quarter of the way from the edge, and extend just a little past the center of the canvas.
Now add branches, extending on the right half of the canvas.
Once the stamp is done, tap the wrench to access Actions, and under Add, select Copy Canvas.
The Brush Studio
In the Brushes Panel, in any brushset, tap the plus sign to create a new brush.
You’ve now entered the Brush Studio! We’ll be adjusting settings within the attributes on the left side menu.
Start under Shape, and next to Shape Source, tap Edit.
In the panel that opens, tap Import, and then tap Paste to pop in the wreath branch you just drew

When the brush is pasted in, it shows as black with a white background. You’ll need to invert it. To do so, use two fingers to tap once on the image.
Then be sure to hit Done in the upper right to save your shape!
Still in the Shape settings, drag the Rotation slider all the way to the right so it is set to Follow Stroke. Then tap Flip Y.
Under Apple Pencil, drag the Opacity slider all the way to the left, so it is set to None.
Under Properties, turn of Orient to Screen, and then drag the Maximum Size slider to 400%.

Now go up to Stroke Path.
Adjust the spacing until your brush starts to look like a wreath, but not so much that there are gaps between the shapes.
This will depend on the length of the very first line you drew.
Next, go to Dynamics.
Here you can drag to Jitter (Size) slider over to create variance in the branch sizes.
You may need togo back to Stroke Path to re-adjust the spacing, as this setting canc reate some gaps.

Optionally, you can adjust the Color Dynamics as well to create variance in the color of the brush!
Adjusting the Stamp Color Jitter (Hue) to around 10% results in a slight amount of color change which works great for botanicals and foliage.


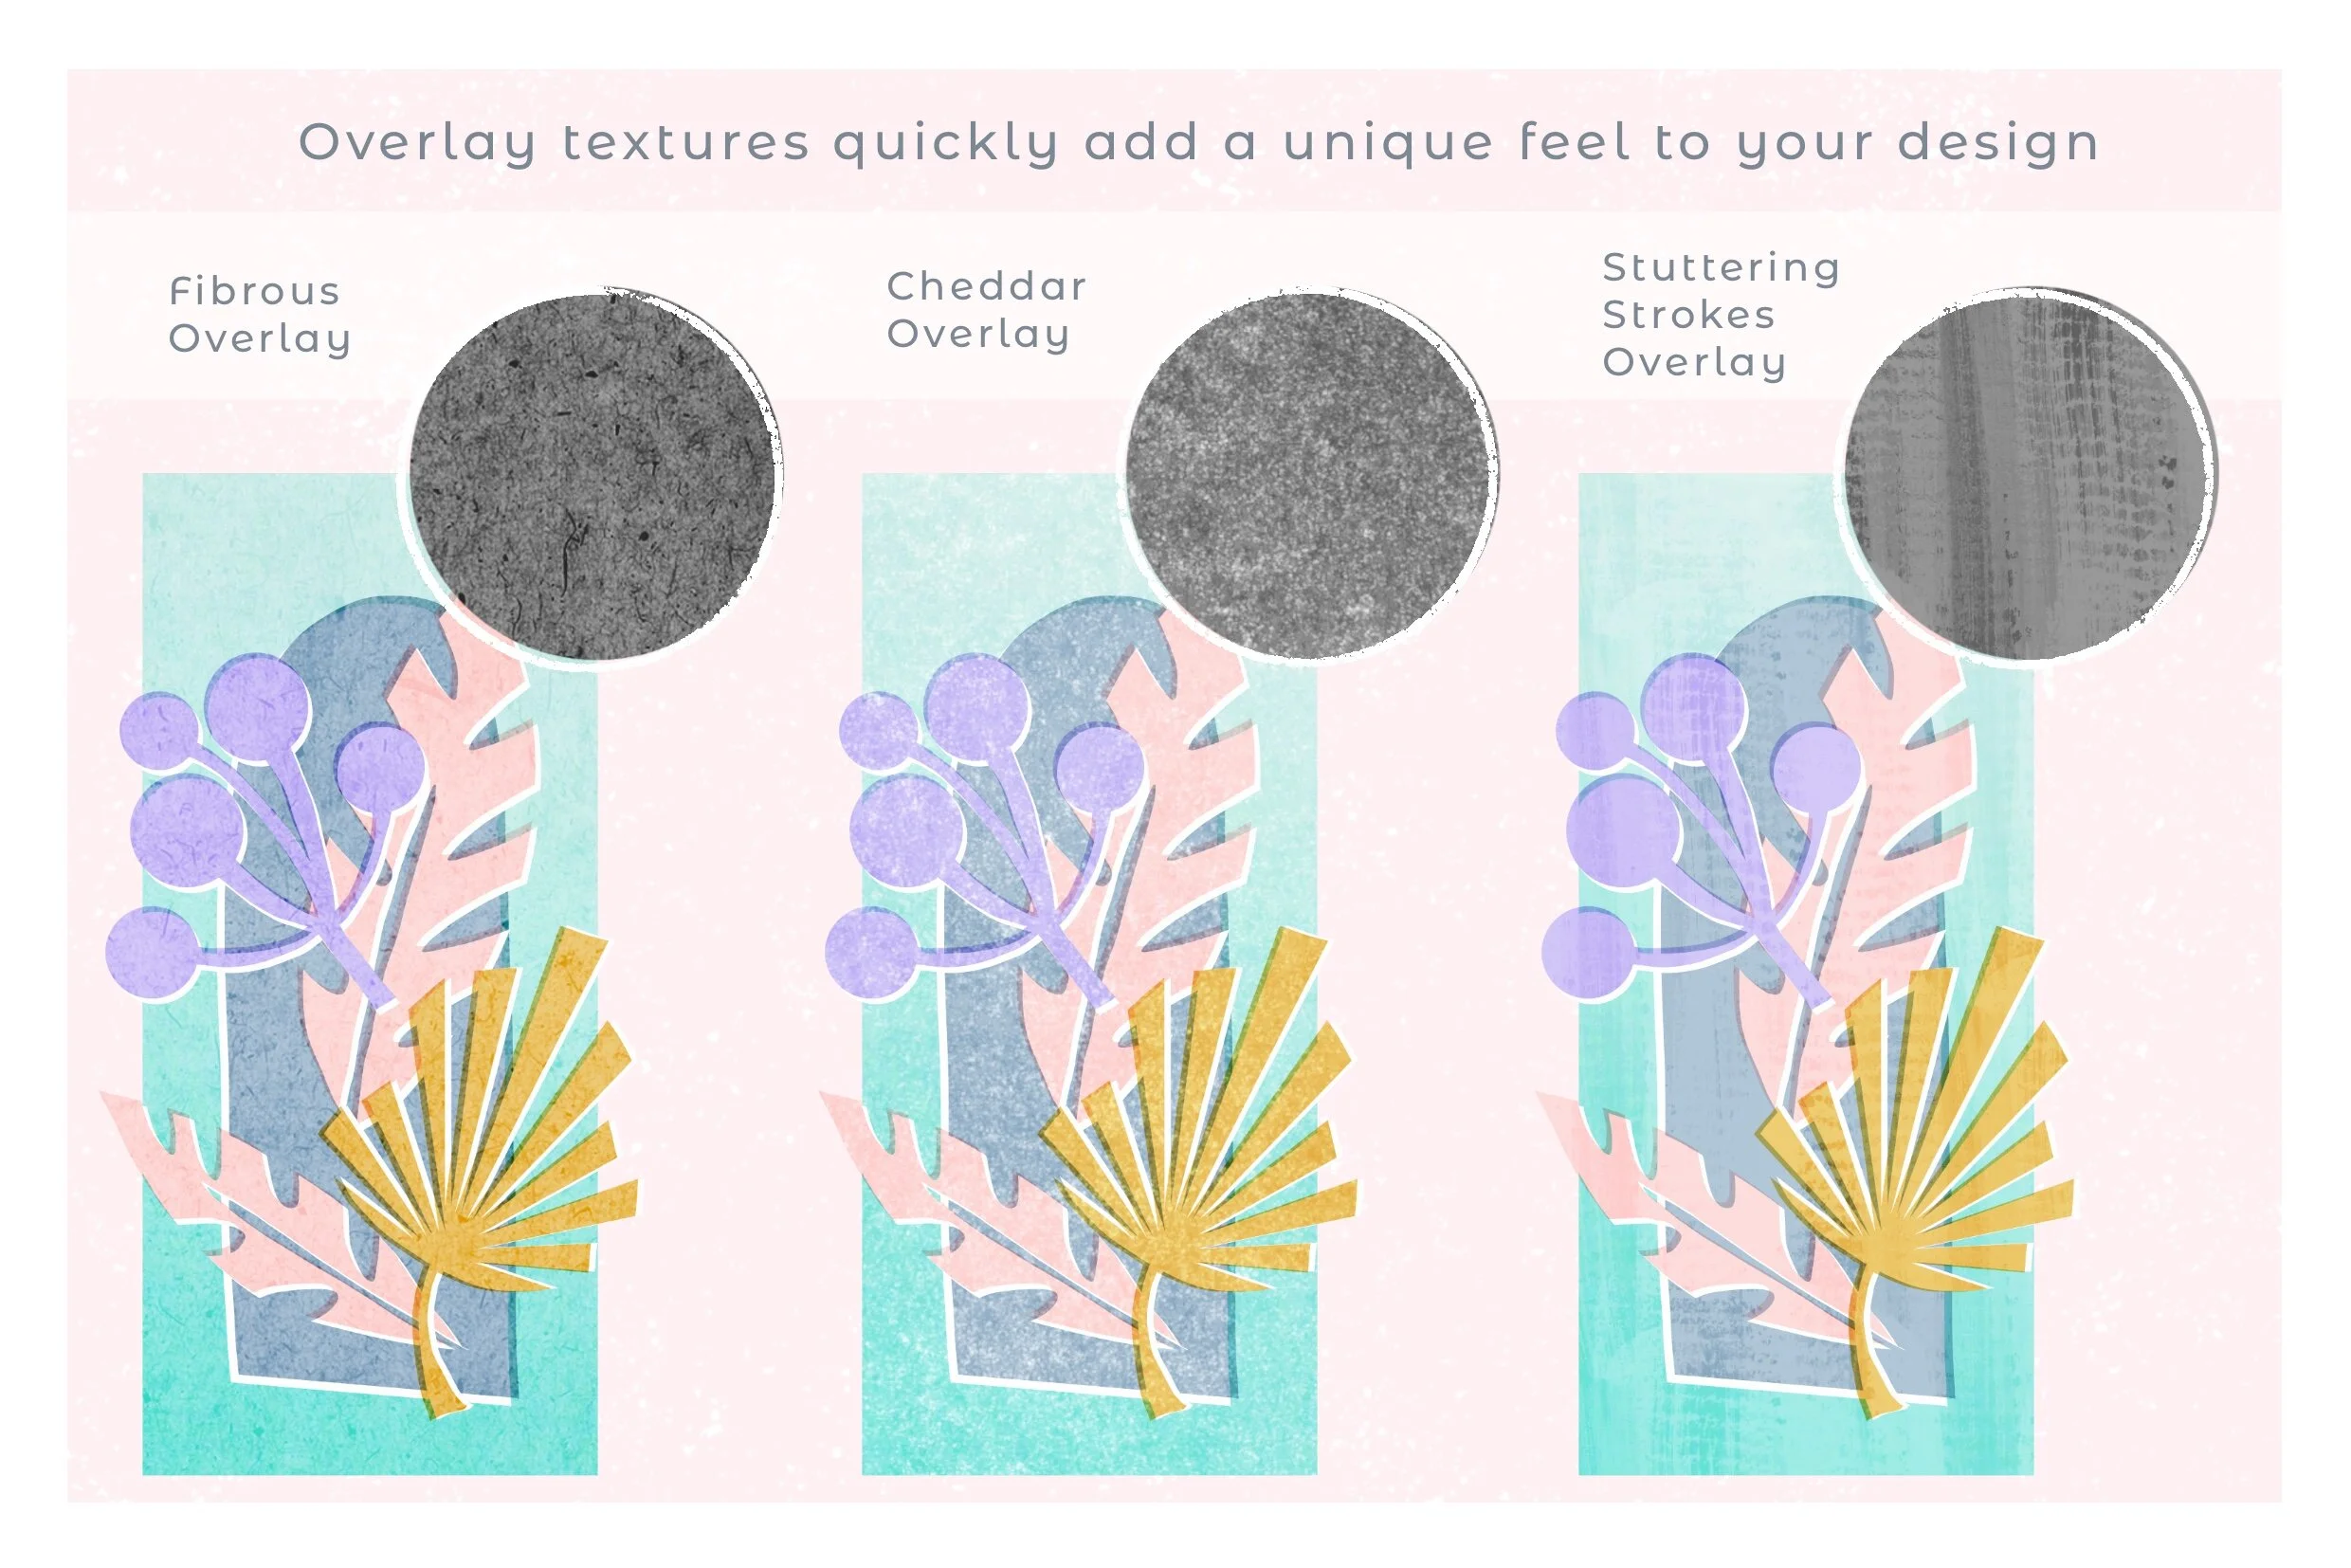
These Overlay brushes can add some great depth to your wreath brush creations.
Learn more about the Overlay pack:
Check out what’s coming up next:
If you enjoyed this demo, consider joining us live for a future session!
Learn more here:
Pin for later:


Never miss A tutorial!
Sign up for my newsletter to get free weekly projects, tips, and Procreate resources.